


Making Test Data from Real Data |
||
|
| ||
Read the part I from the series: Depersonalizing Your Test Data We will show you how to mask sensitive data, such as E-mail addresses, phone numbers, physical addresses, social security numbers, postal codes in XML and HTML documents, SQL scripts, and any other text-plain files. Using the DataDepersonalizer tool, you can even replace the real IP addresses with looking realistic generated data. Let us go ahead and look at how to set up the data source, define the replacement rules, and start the depersonalization process.
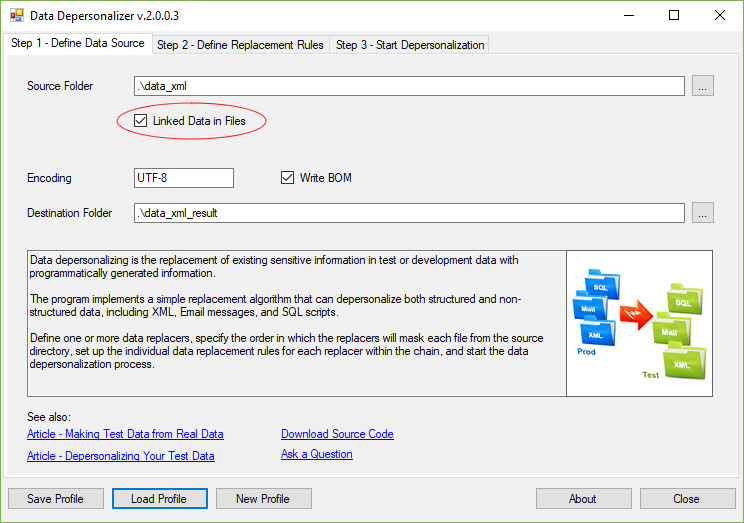
Step 1 – Define Data SourceWhen you run the DataDepersonalizer tool, you can see the tab page that allows you to define both the data source directory and the destination directory, which is used for saving masked data. This page allows you to define the file encoding parameter and specify if the BOM information should be saved to the resulting text file. There is one important option on this page: you can specify, whether text files within the source directory have linked data, such as names, E-mail addresses, postal codes, order numbers, etc. If it is yes, each unique data items will be replaced with corresponding generated values. If two files from the source directory contain, e.g., the E-mail address "steve@domain.com", both addresses will be replaced with the same fragments of corresponding generated values. Otherwise, a new E-mail address will be generated per each file.
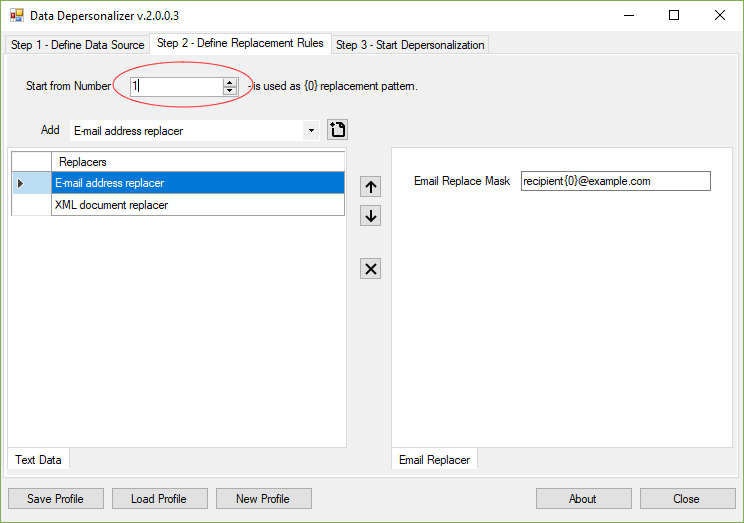
Step 2 – Define Replacement RulesOn this page, you can define one or more data replacers, specify the order in which the replacers will mask each file from the source directory, and set up the individual data replacement rules for each replacer within the chain. Depending on the data type and its structure, you need to use different algorithms for extracting and replacing sensitive values in this data. The DataDepersonalizer tool offers a wide range of data extracting algorithms. It supports XML and HTML documents, text files, containing the "name:value" pairs, and also any text-based data files. Each data extraction algorithm is implemented in a corresponding data replacer. Suppose, you have a set of XML report files from your E-commerce platform that provides information about your customers. For testing your report system, you need to mask real data, such as E-mail addresses, phones, user and company names, registration IDs, VAT IDs, etc. You can add the following replacers to your replacement rules: "E-mail Address Replacer" and "XML Document Replacer". The "E-mail Address Replacer" provides the only one parameter - the replacement mask. You can specify, e.g., a static anonymous address, such as "someuser@example.com". This value will be used for each email within your XML document. If you want to dynamically change this value, you can use the following format: "someuser{0}@example.com". The "{0}" parameter will be replaced with a constantly increased numeric value. The initial value for this parameter can be specified using the "Start from Number" textbox.
The "XML Document Replacer" allows you to set up a list of "Node Name"/"Replace Mask" parameters. Let us add the following items here:
You can add any desired XML node name which value you wish to replace.
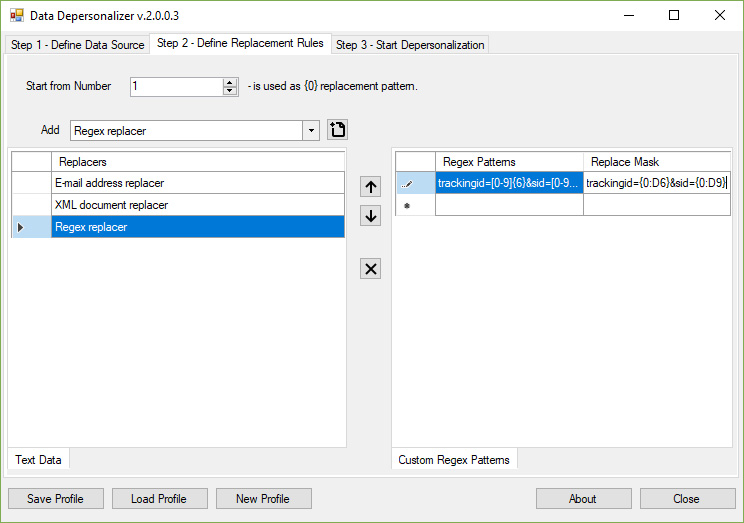
If you need to mask some specifically formatted data, you may add "Regex Replacer" and specify custom regular expressions for both locating and replacing sensitive data. E.g., for replacing the URL query string parameters, you can use the following Regex pattern: "trackingid=[0-9]{6}&sid=[0-9]{9}". This pattern will extract the strings that look like the following:
The replacement mask may look like the following: "trackingid={0:D6}&sid={0:D9}". It makes the replacer to insert 6 generated digits for the "trackingid" parameter, and 9 digits for the "sid", correspondingly.
The "Name/Value Pair Replacer" allows you to specify a list of names and a corresponding list of replacement masks using the replacement mask format described above. The "HTML Document Replacer" utilizes the HTML tag ID for locating personal data to be replaced. There are two more data replacers: "Text Replacer" and "HTML Text Replacer". Both these replacers allow you to replace statically defined values (named as Keys) using a corresponding replacement mask. You can leave the key list empty to replace the same data with corresponding values which were generated by the previous replacers. Additionally, the "HTML Text Replacer" applies the HTML Entity encoding to the replaced values.
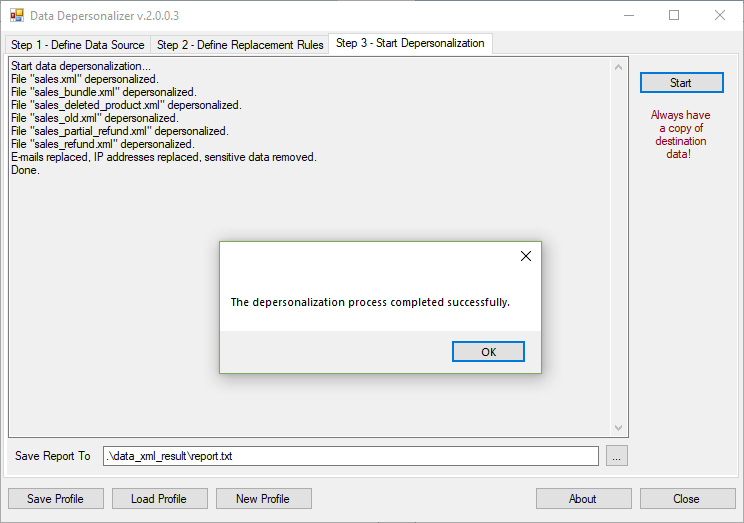
Step 3 – Start DepersonalizationFinally, when you specified the data source and the replacement rules, you can start the data depersonalization process. Here, you can define the log file name to which the DataDepersonalizer will save information about the current progress. Simply press the "Start" button and see the results. Note, if you use the same directory for both the data source and the destination, make you sure that you have a copy of your original data.
Download Source Code
License InformationThe DataDepersonalizer application is distributed under the GNU LESSER GENERAL PUBLIC LICENSE Version 3.
Sergey Shirokov
|