Interbase DataPump Tour |
||
|
| ||
Step 1 - Select your databases and set up propertiesYou need to select source and destination databases first. For ADO/BDE source you also may specify how to handle boolean fields (which do not exists in Interbase/Firebird and you may want to convert them into char 'Y'/'N' or integer 1/0 presentation for example). Interbase v 7.0 has special native boolean data type supported by Interbase DataPump starting from version 3.4. Please pay extra attention to 'Select Option' and 'Quote Field Names' options. Different SQL servers/database engines use different options and you should set the right one. If you keep getting error messages during obtaining databases structures or SQL script generation it may means that you set this options incorrectly. Please refer to your SQL servers/database engine documentation or write us for help Here is some information for common cases:
To be sure that databases selected properly use 'Test Connection' buttons 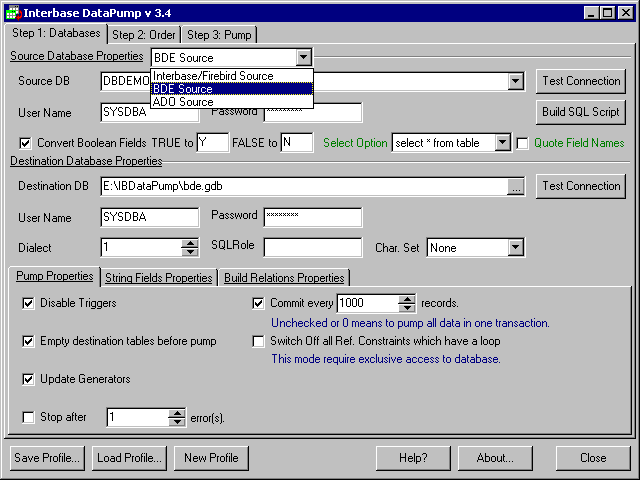
Pump Properties
Disable Triggers - turn off triggers for pumping time. 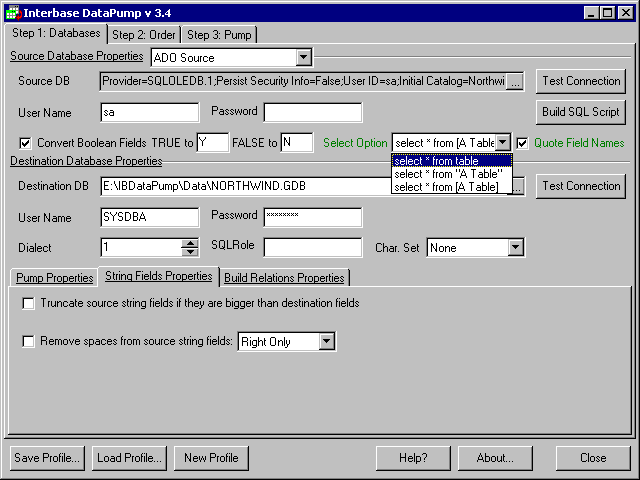
Build Relations Properties
Case-insensitive fields/tables comparison - convert table/field names to upper case when compare (see Step 2). Step 1 - Generate Interbase/Firebird SQL script based on your ADO/BDE sourceHit 'Build SQL Script' to display generation script dialog. 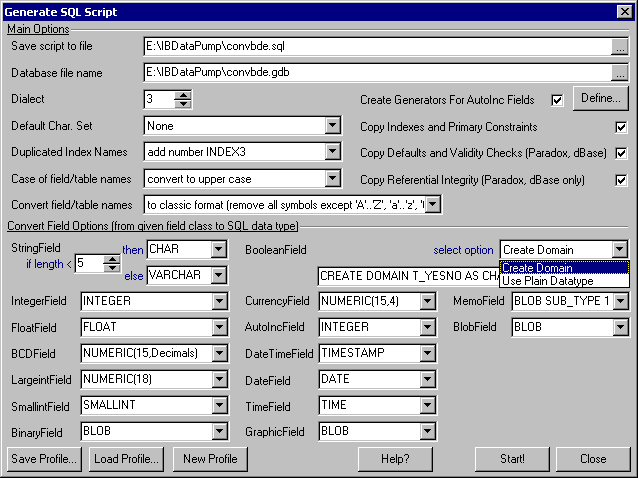
You can select how different data types from original database will be mirrored into Interbase/Firebird data types. To define autoincremental fields manually please use special dialog. 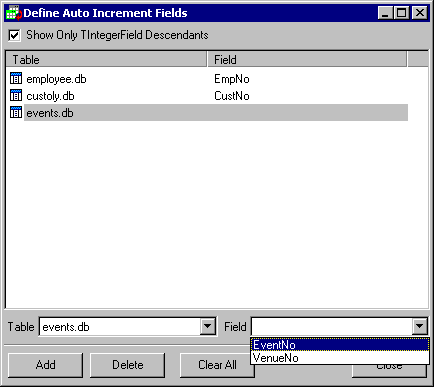
Select tables and fields which should be treated as AutoInc fields. Interbase DataPump will build script which will totally identical to you original database structure. After script generated you can execute it from IBConsole or any other admin tool to build actual Interbase or Firebird database. See examples of BDE(dBase and Paradox) to Interbase BDEtoIB.sql (BDEtoIB.zip) and ADO (MSSQL) to Interbase MSSQLtoIB.sql (MSSQLtoIB.zip ) conversions. Step 2 - Obtain databases structuresOnce all databases are selected and all properties are set up you need to get databases structures. After you click on 'Get Definitions', Interbase DataPump will fetch structure of source and destination databases. Source tables will be sorted in alphabetical order and destination tables will be sorted in order which they depend from each other (this is based on analysis of the referential constraints between tables - if there's no referential constraints in database then tables will be in alphabetical order too). In case if you getting any error messages during this process this most likely means that your ADO/BDE 'Select Option' and/or 'Quote Field Names' option is wrong or Interbase Dialect or User Name/Password incorrect. Go back to Step 1 and set proper value. Step 2 - Set relations between source and destination databasesNow then you have all information it is time to set relations between tables and fields for source and destination databases. Click on 'Build Relations' to build relations in automatic mode. In this case relation will be build based on name comparison. Tables which do not have all relations between fields will be highlighted in red
. Of course, you always can set up relations in manual mode using drag&drop: 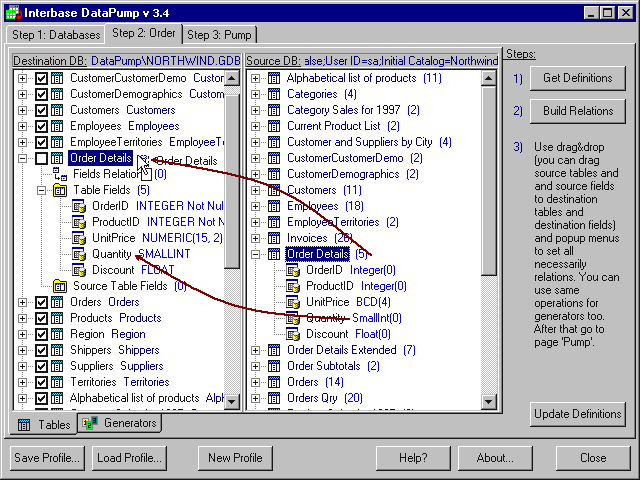
Use mouse drag&drop to link tables, fields and generators which weren't liked automatically (see images above and below for example). You can drop:
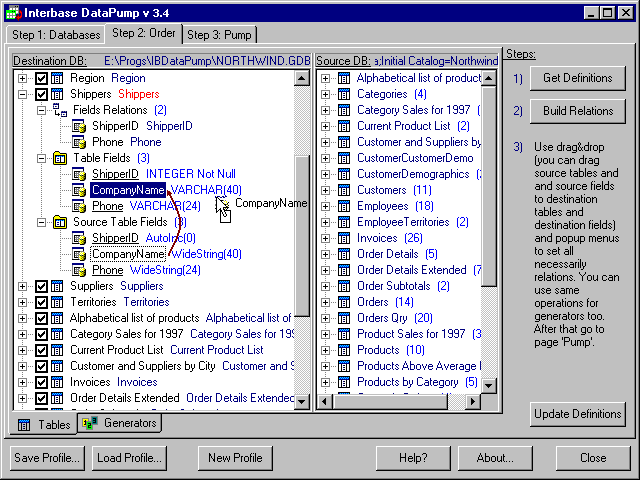
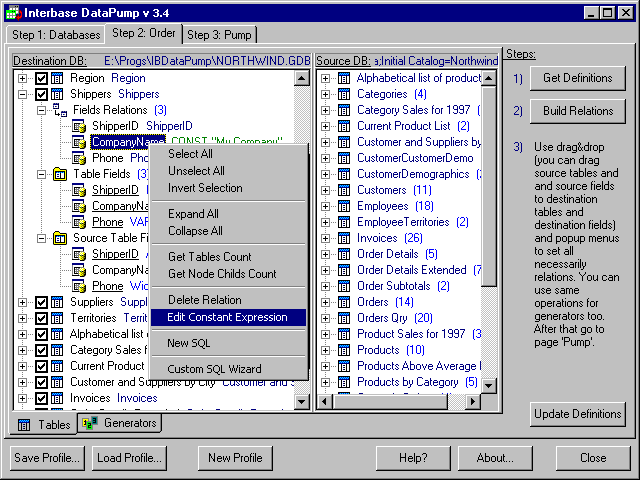
In case if you want to define constant expression for field/generator use popup menu. Such constant expressions will be highlighted with green color .
To navigate on destination and source trees use mouse:
Please note that all above applies for 'Generators' tab too. Step 2 - Specify destination and source custom SQL. Destination Custom SQL WizardTo define custom SQL statement on source database use popup menu item 'New SQL'. 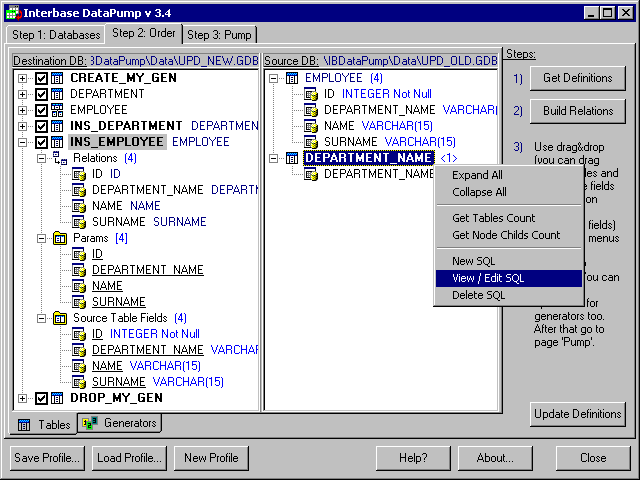
Advanced SQL editor will help you to build and test SQL statements. Custom SQL source/destination names will be highlighted with bold font. You can write SQL statements and test the results. 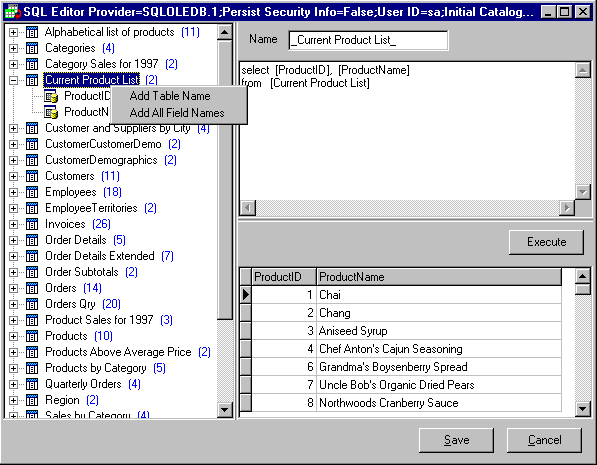
For destination database custom SQL can be created as well. You can specify delete, update, insert SQL statements with params. 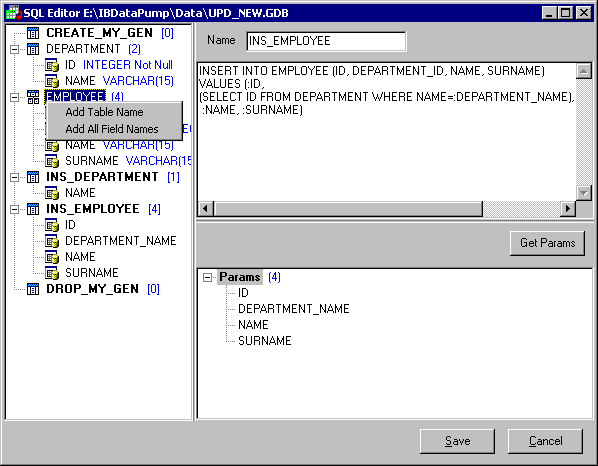
Special Custom SQL Wizard will help you to write quickly desired SQL for destination database. 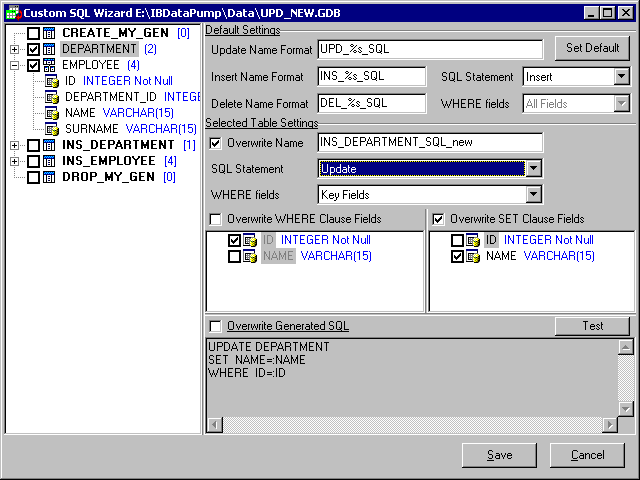
After you specified link between destination custom SQL and source table/custom SQL then during pump process destination params will be filled with source values and executed. Checked destination custom SQL without source link will be executed as well - you can create tables etc. using such custom SQL. You can change order of destination custom SQL items using mouse drag&drop. Exactly same rules and functionality available for 'Generators' tab. If destination generator linked to custom SQL source then after custom SQL executed value of result field with the same as the generator name will be assigned to destination generator. If there is no filed with same as generator name then value of the first field will be used. 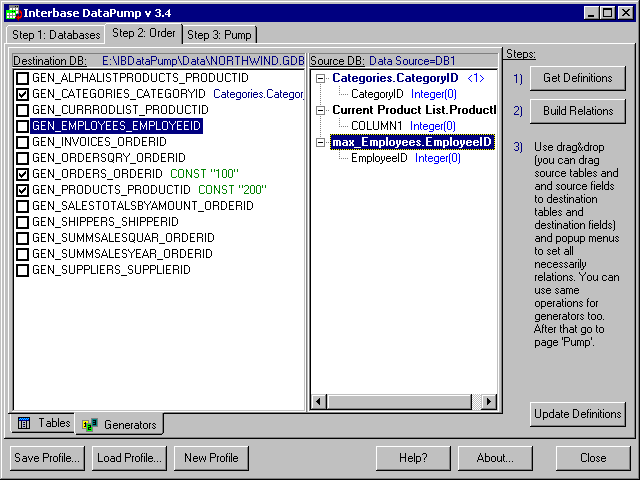
Custom SQL feature gives you great power - updating data from one database with data from another, simple replication and many other things now possible. You can use not only data manipulation SQL but also data definitions statements (such as create/drop tables, fields etc.) inside custom SQL and save/send Interbase DataPump profile to your customers where it will be executed - this way you can supply your customers with reliable and proved technology to update or upgrade database. Please read this article Interbase DataPump Frequently Asked Questions for details and examples of using custom SQL. Step 3 - Pump dataSimply go to 'Pump' tab and press 'Start' button. Data will be processed according made settings. All details about whole process will be logged and displayed. 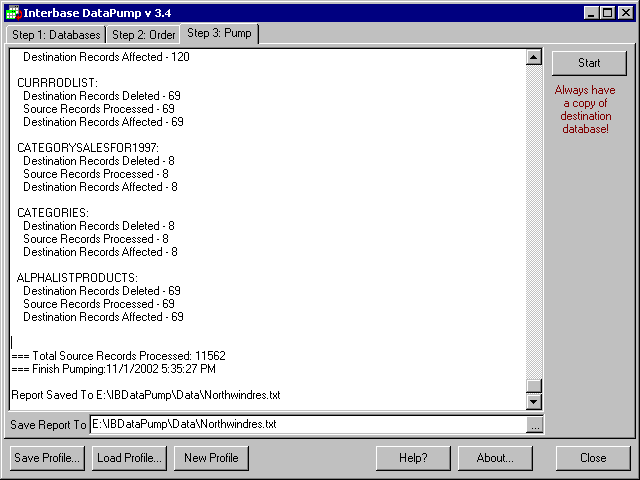
See example of pump report here Northwindres.txt or UpdateDataExample.txt Calling Interbase DataPump from command line and command line optionsUsage:
Examples:
Using Interbase DataPump DLL. Silent ModeInterbase DataPump also available as a plug-in DLL for popular Interbase administration tool IBExpert www.ibexpert.com. You can download IBDataPump DLL from Downloads page. This DLL also can be used from your applications to perform updates of your clients databases in silent mode. Please see Delphi and Borland C++ Builder examples (available on Downloads page) for more details. Brief dll functions info (Delphi).
Interbase DataPump using InterbaseExpress components to access Interbase/Firebird, ADOExpress to access ADO sources and standard BDE components to work with BDE sources. Tips&Trics
|


